How to Setup Your Syncstrokes
This tutorial will guide you through setting up your SyncStrokes device.
- Connect the Assistive Arm as shown.

- Mount SyncStrokes onto a rigid object using the desktop mount. We recommend connecting the desktop mount using the bottom 2 bolts (the bolts that are further away from the power switch), as this will apply less pressure to the structure of SyncStrokes.
-
You can also choose to mount SyncStrokes onto a monitor stand. This will provide you with a different angle of motion.
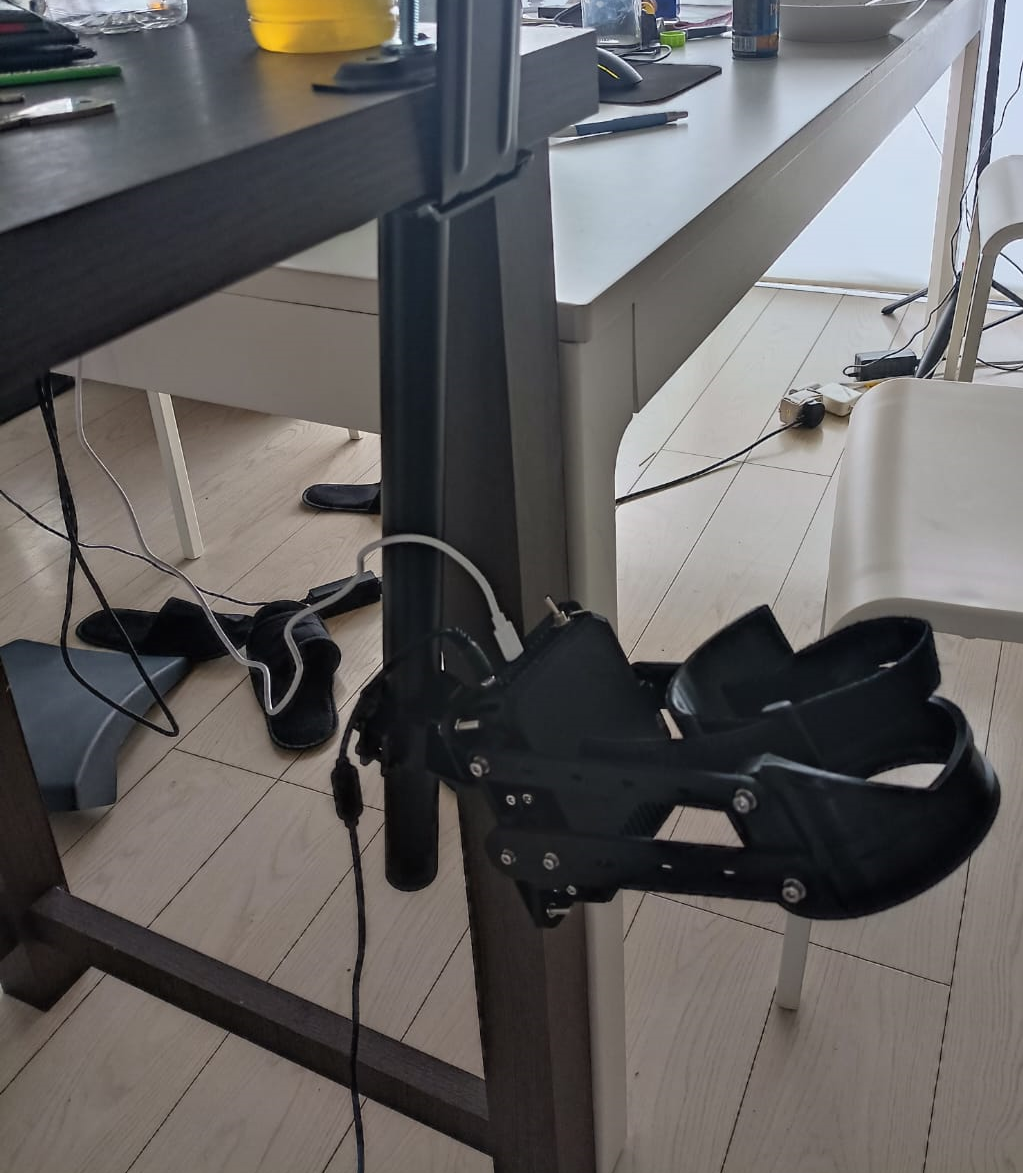
- Once set up, connect SyncStrokes to a Windows PC via USB.
-
Download the drivers for SyncStrokes from this link.
-
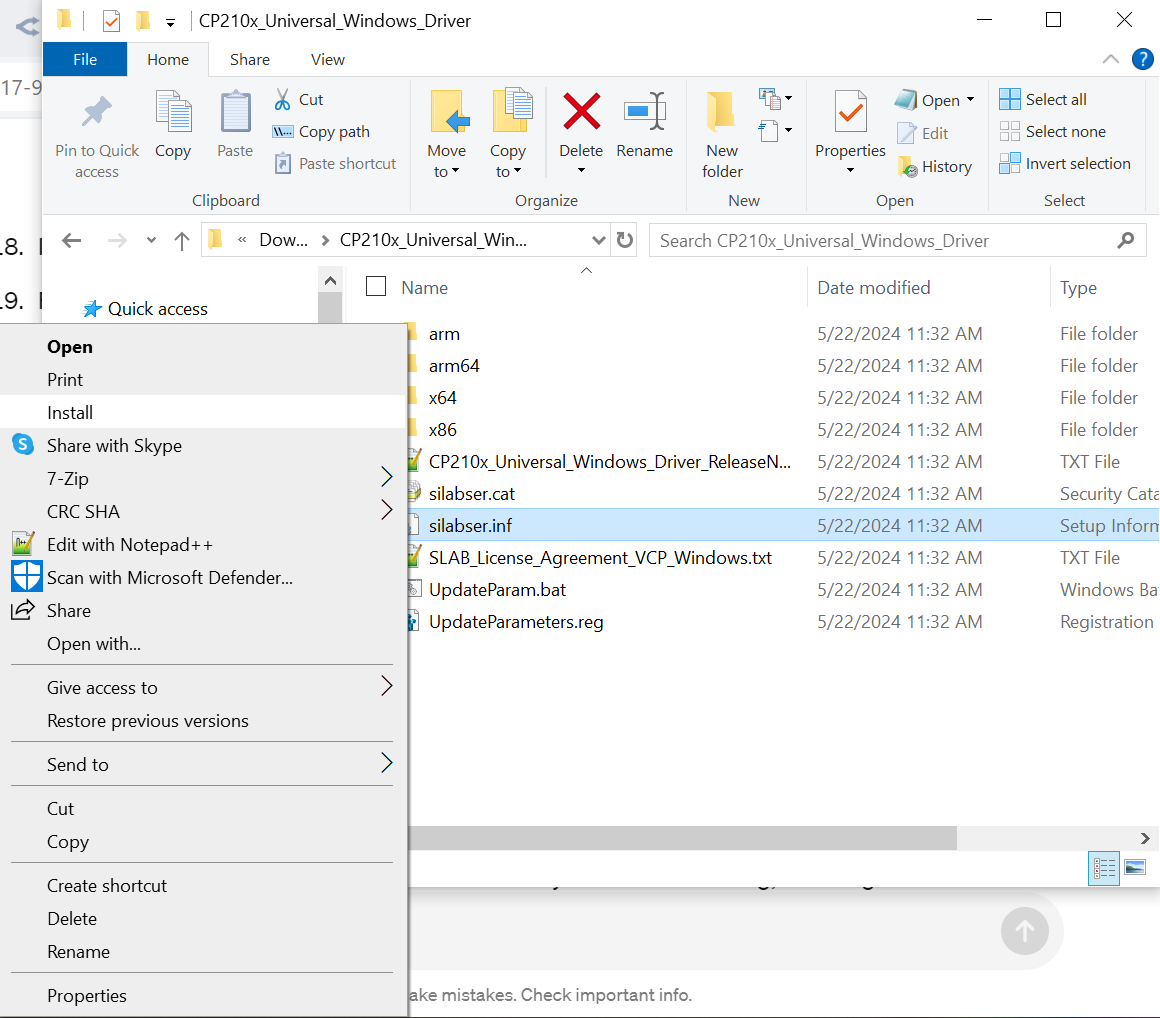
Unzip the downloaded file. In the unzipped folder, right-click on ‘silabser.inf’ and choose ‘Install’.
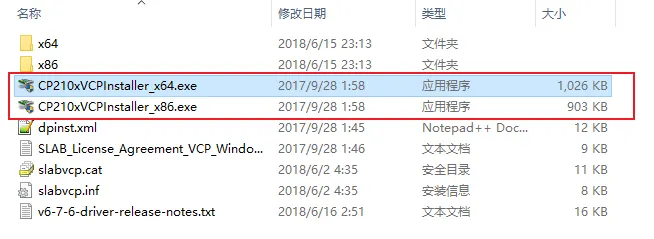
Driver Installation for Windows 7/8/8.1 Users:
-
Download the driver via this link.
-
Unzip the downloaded file. In the unzipped folder, run the ‘.exe’ file to install the driver.
Checking the Driver Installation:
-
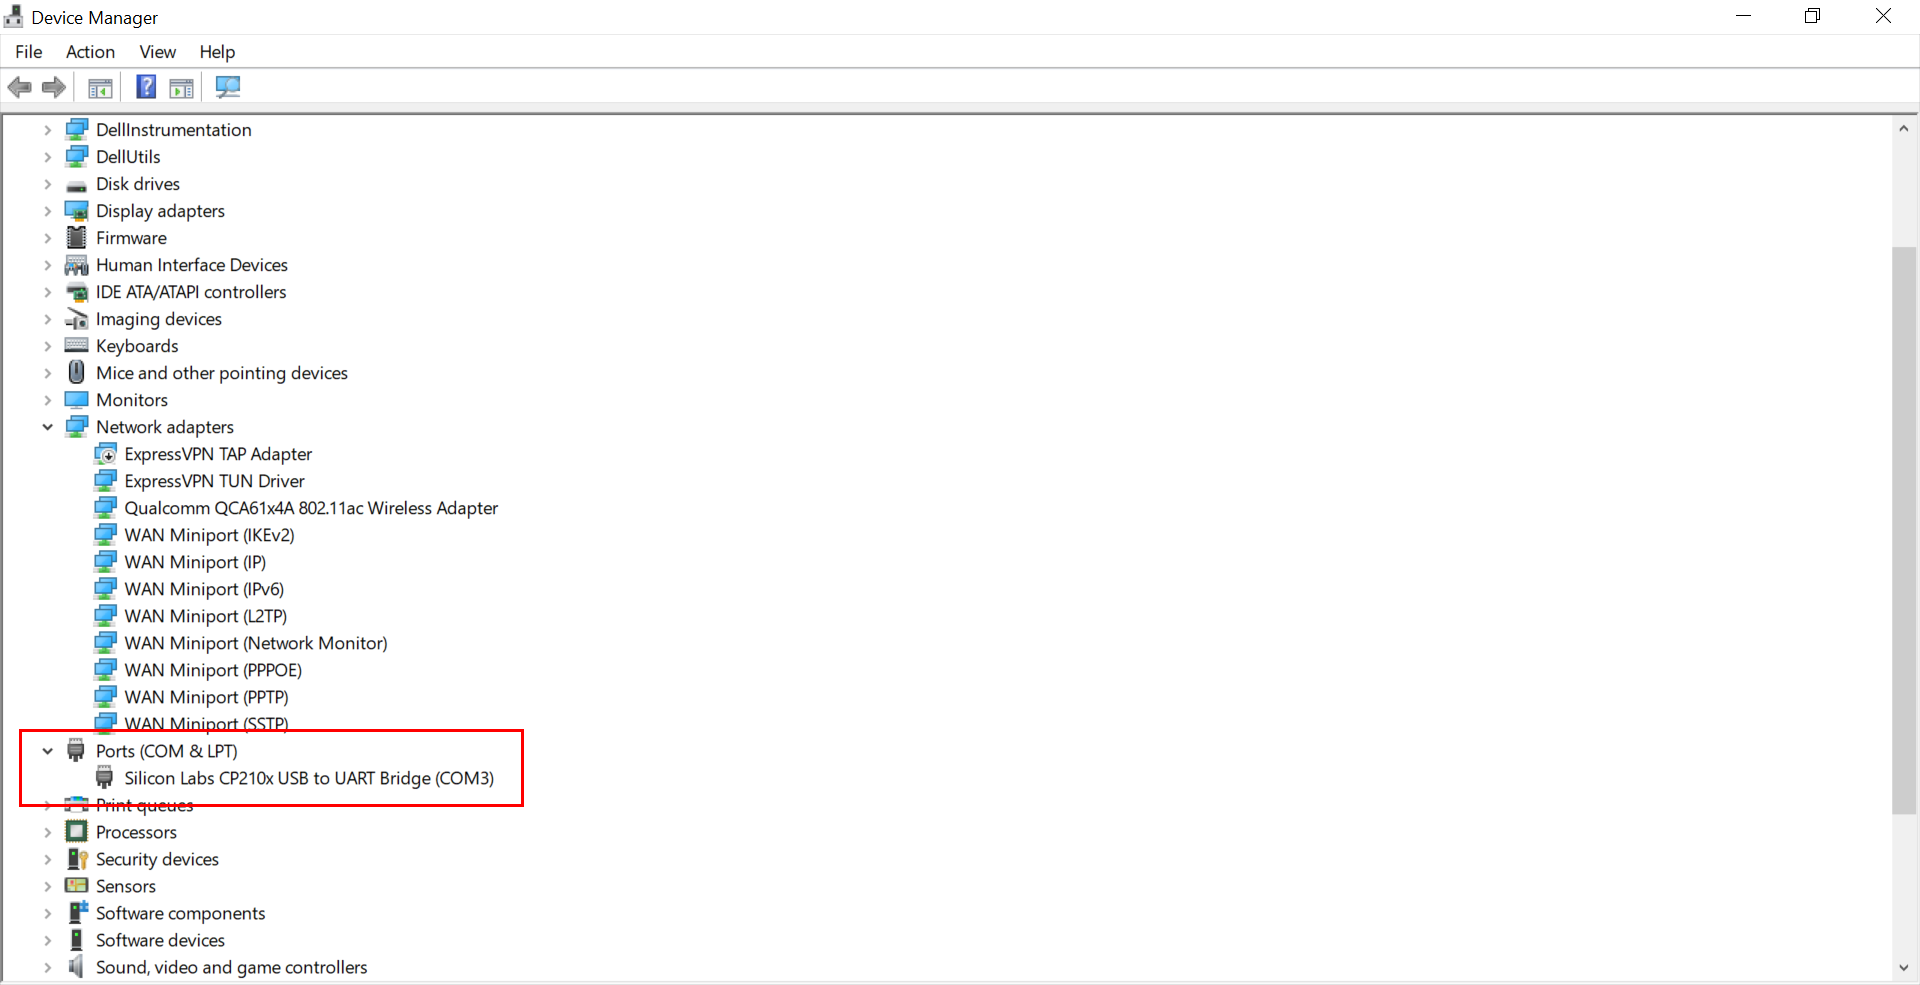
To verify the installation, press ‘Win + R’ to open the Run dialog box, type ‘devmgmt.msc’, and press Enter.
-
If you see “Silicon Labs CP210x USB to UART Bridge” in the Ports section, the driver setup is complete.
Setting Up SyncStrokes for Interactive Content:
-
SyncStrokes supports both VR and 2D interactive adult content through MultiFunPlayer. Download MultiFunPlayer here and unzip it.
-
For 2D interactive content, you also need MPV, a free, open-source, cross-platform media player, together with MultiFunPlayer. Download MPV here.
-
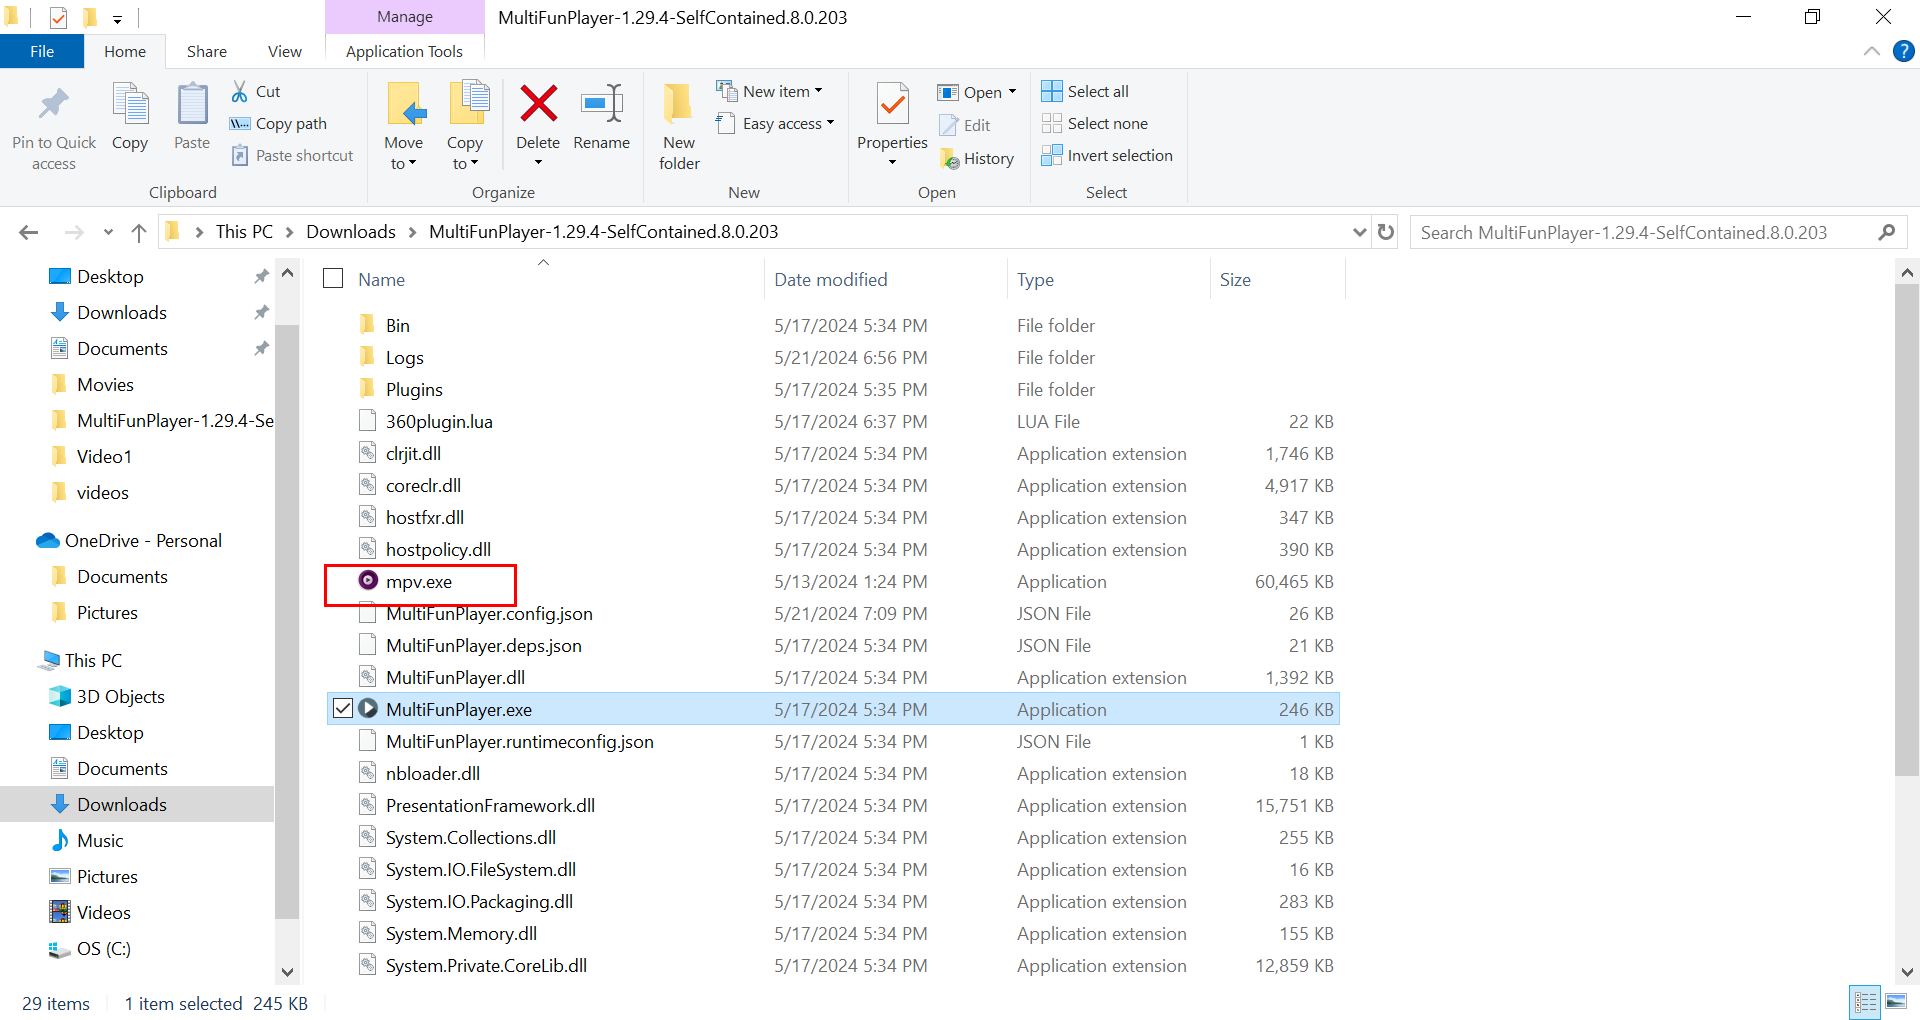
Copy the ‘mpv.exe’ file from the MPV download and paste it in the unzipped MultiFunPlayer folder as shown.
Launching MultiFunPlayer:
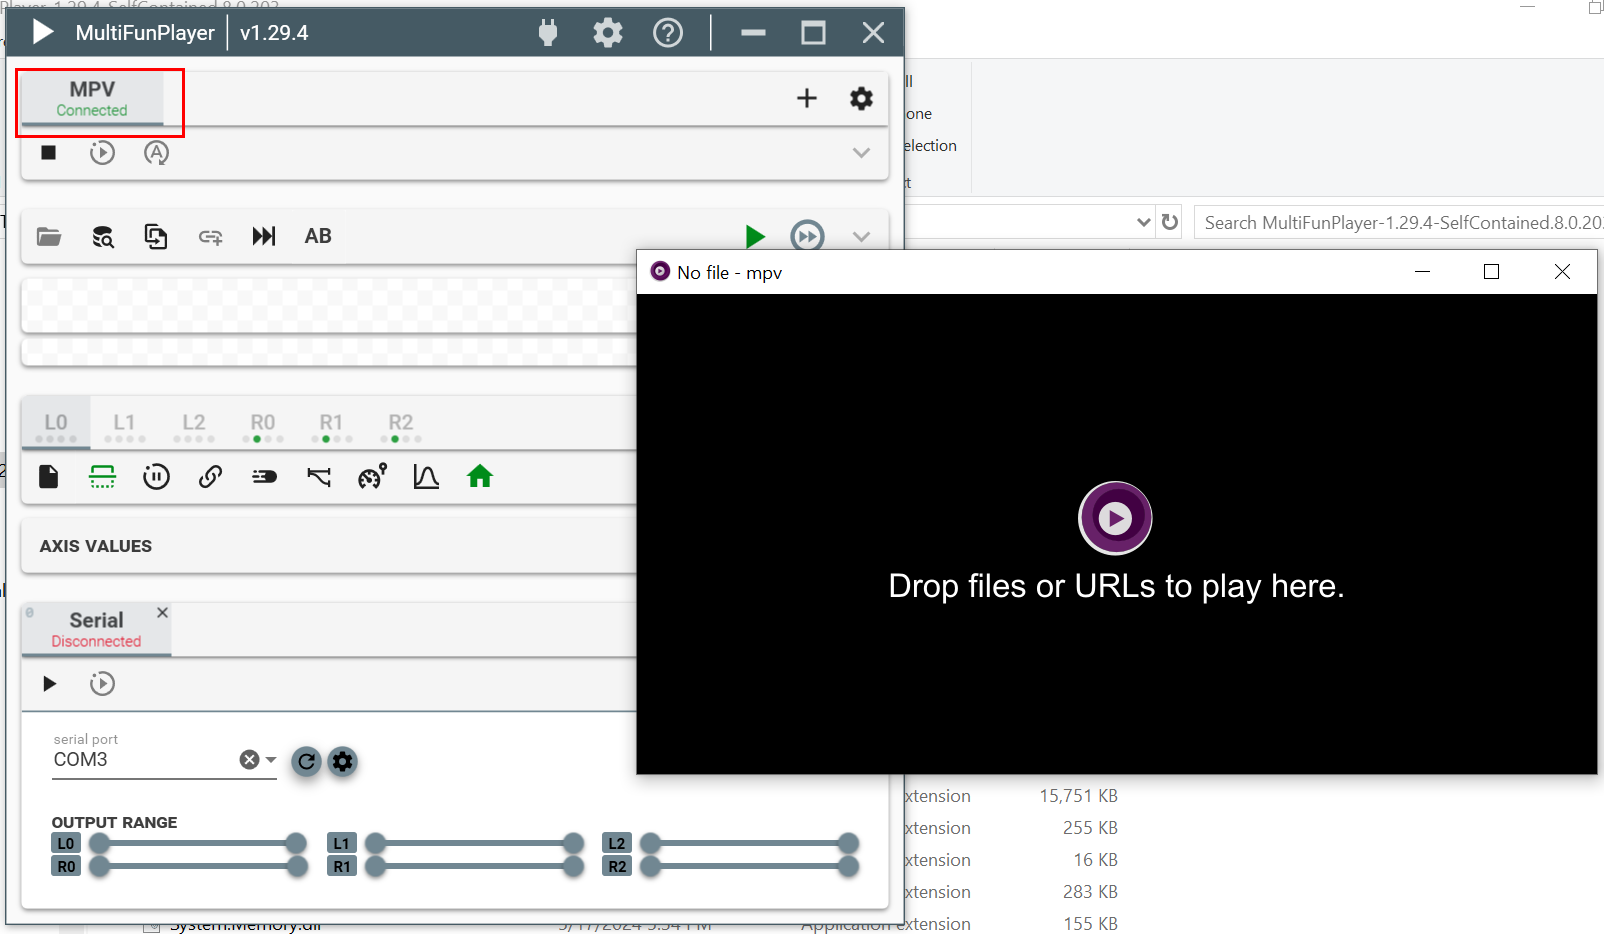
- Connect SyncStrokes to your Windows PC via USB and to a power source. You can now launch MultiFunPlayer. Double-click ‘MultiFunPlayer.exe’, press the “+” button, choose ‘MPV’, and click the play button.

-
The MPV player should launch in the background, and you will see “Connected” in MultiFunPlayer under the MPV section as shown.
Connecting SyncStrokes in MultiFunPlayer:
-
In the ‘Serial’ section, you should see an option to choose the serial port. Choose the serial port and hit the ‘connect’ button as shown.

-
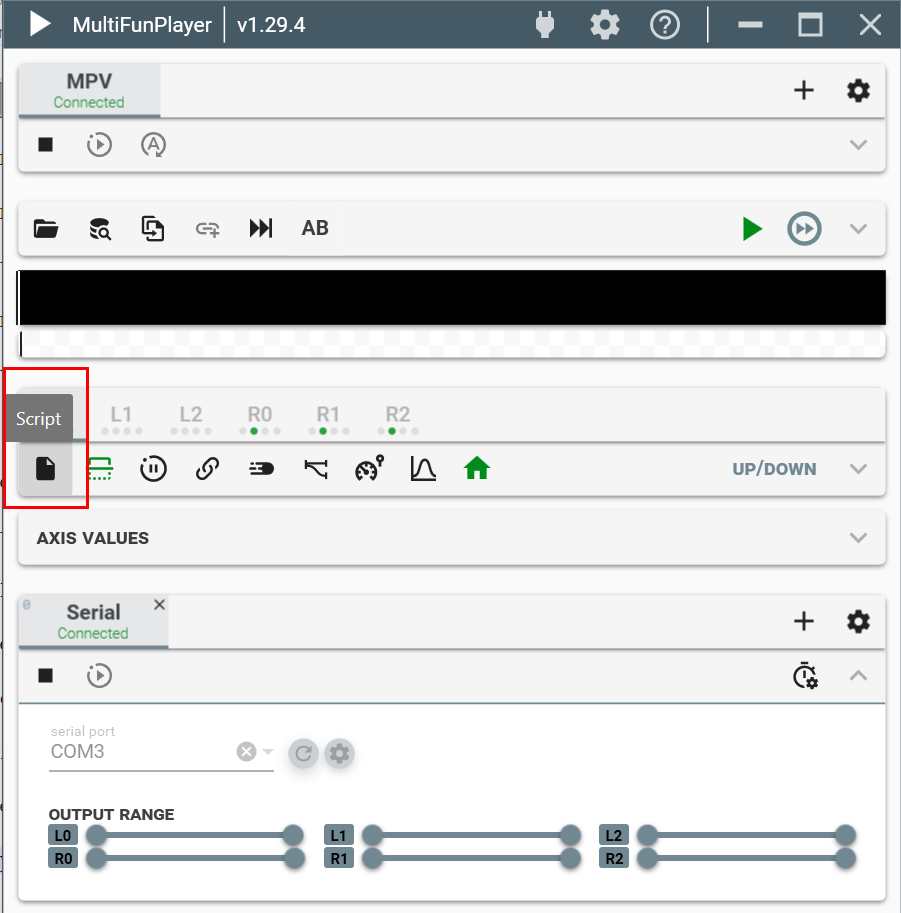
Now SyncStrokes is connected to MultiFunPlayer! SyncStrokes requires both an MP4 video file and a ‘.funscript’ file for synced motion. Simply drag and drop your prepared interactive MP4 video into the MPV player, then load the ‘.funscript’ in the script section of MultiFunPlayer. Play the video in MPV player and enjoy the synced motion!
Adjusting the Intensity:
- Is the synced motion too strong? No problem! You can adjust the intensity in the Script Section as shown.

Using SyncStrokes with VR Content:
- For VR content, you can add the DeoVR App (instead of MPV) in MultiFunPlayer and repeat the above process. The DeoVR app can be downloaded here.
Expanding Your Interactive Experience:
- Free Interactive Video & ‘.funscript’: EroScripts, FapTap
- Virtamate Interactive Adult Games with SyncStrokes Plugin & Other Interactive Games:
- Get the Virtamate at Virtamate Patreon.
- Get the SyncStrokes plugin at Virtamate Hub.
- Syncstrokes also support other interactive games such as LoveMachine Mod, available on GitHub.
- Completely control SyncStrokes via web browser: Ayva Stroker Lite (Supported browsers: Chrome, Edge, Safari)
- Long-distance play with your partner: Remote Ayva Software
Find Extensive Support and Tutorials on EroScripts
As you dive into your SyncStrokes experience, you might want more detailed guidance on setting up new devices or integrating with various software. For comprehensive tutorials and community-driven support, visit the EroScripts community. There, you can find a wealth of resources including step-by-step guides on new device setup, software integration, and much more, all tailored to enhance your interactive content experience. Join the conversation and learn from experienced users at EroScripts.